
01
Access Property Settings
Configure property-related details such as specifications, type, and owner information.
Follow the steps below to complete this action inside Marafiqy.
Configure property-related details such as specifications, type, and owner information.
Update or create new property manager terms, pet policies, and facility rules.
Adjust the service list, set up service alerts, and define request processing times.
Access and update information related to inventory and asset management.
Manage SLA configurations for service requests, asset requests, inventory requests, and complaints.
Define and modify roles and access permissions for different user types.
Set up rent and payment notifications, late fee policies, income, and expense settings.
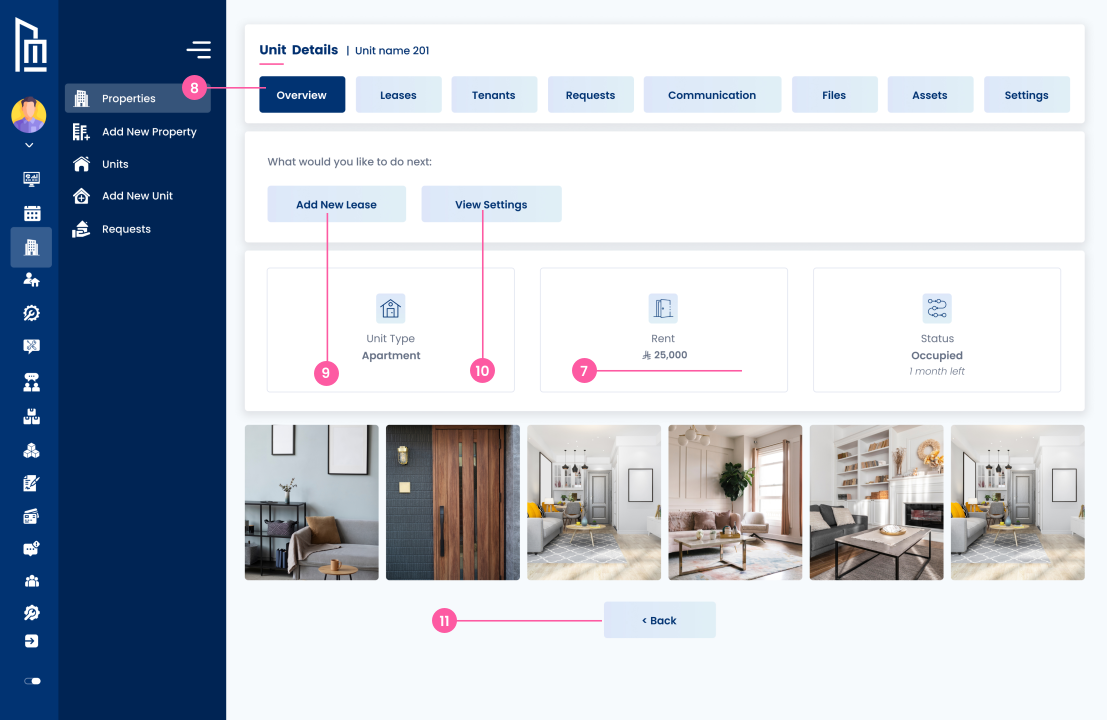
Click the “Back” button to return to the previous page.
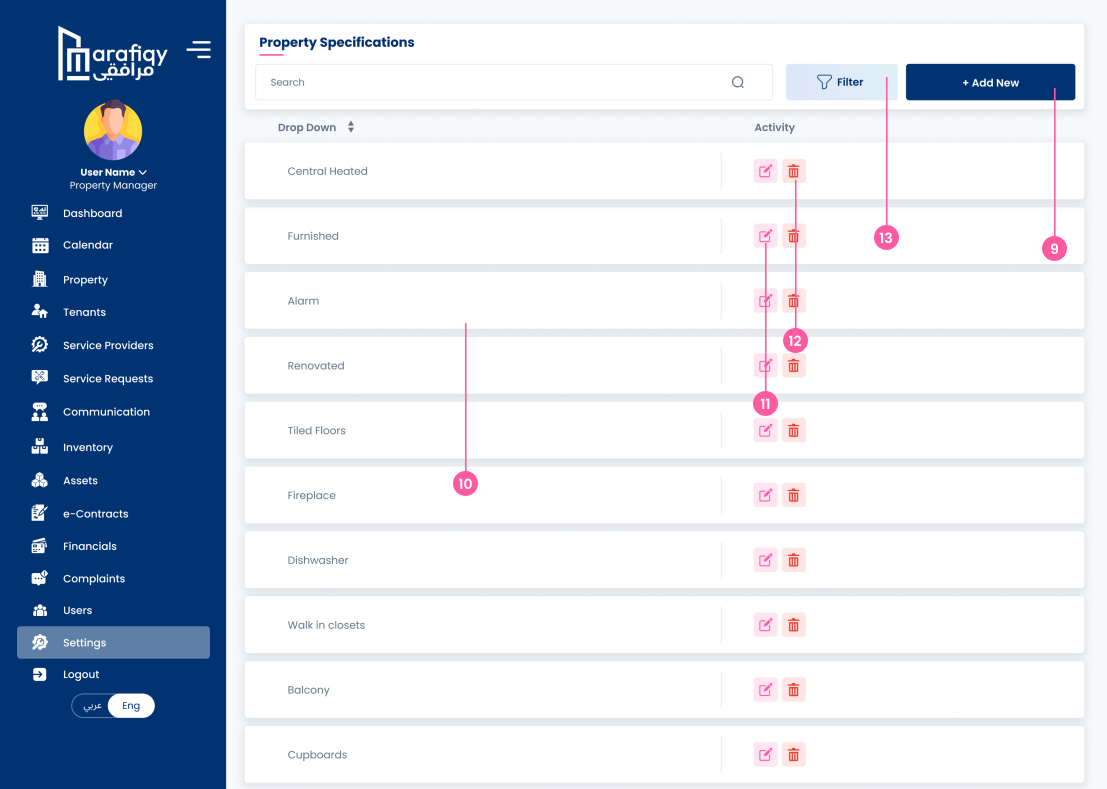
Click on the "Add New" button to add new property specifications to the list.
See existing property specifications listed in the dropdown menu, such as Central Heating, Alarm, etc.
Click on the edit icon to modify the details of an existing property specification.
Click on the trash icon to remove a property specification from the list.
Use the filter option to search or filter the property specifications.
Click on the "+ Add New" button to add a new property type to the list.
See the list of property types, including Single Unit, Building, Compound, Industrial, Retail, Office, and others.
Click on the edit icon to modify an existing property type.
Click on the trash icon to remove a property type from the list.
Use the filter option to search or filter property types in the list.
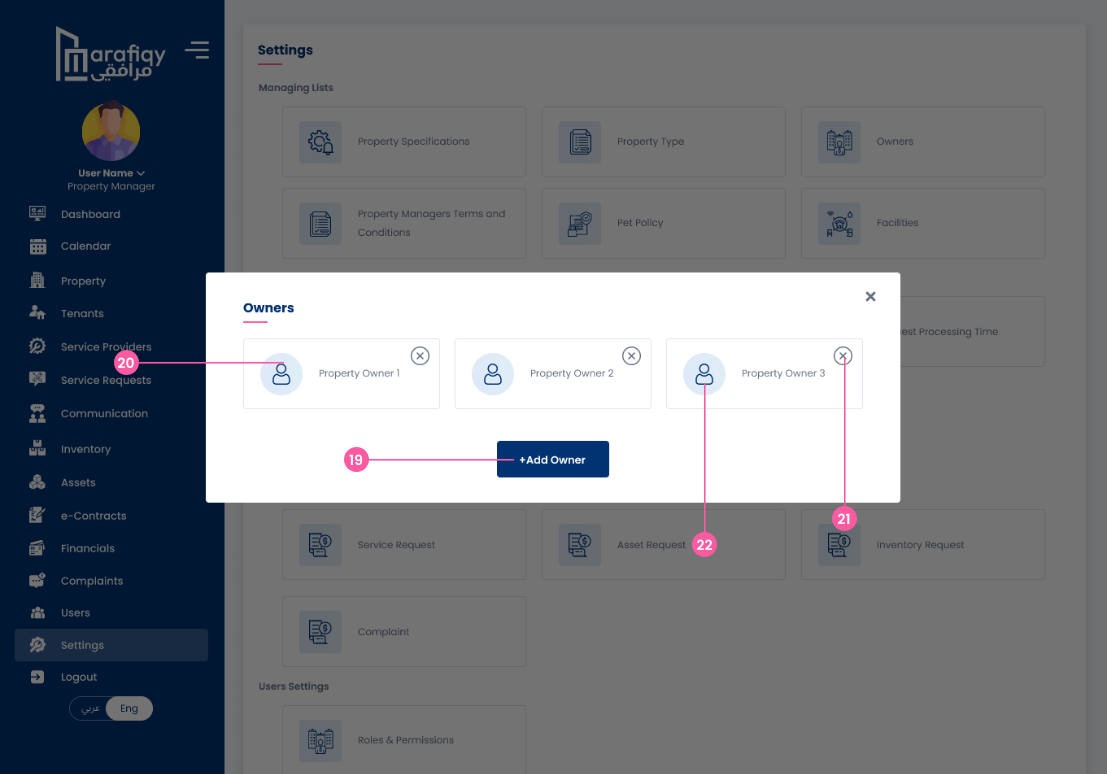
Click on the "+ Add Owner" button to add a new property owner.
See a list of existing property owners.
Click on the "X" icon to remove a property owner from the list.
Click on a property owner to view or edit their details.
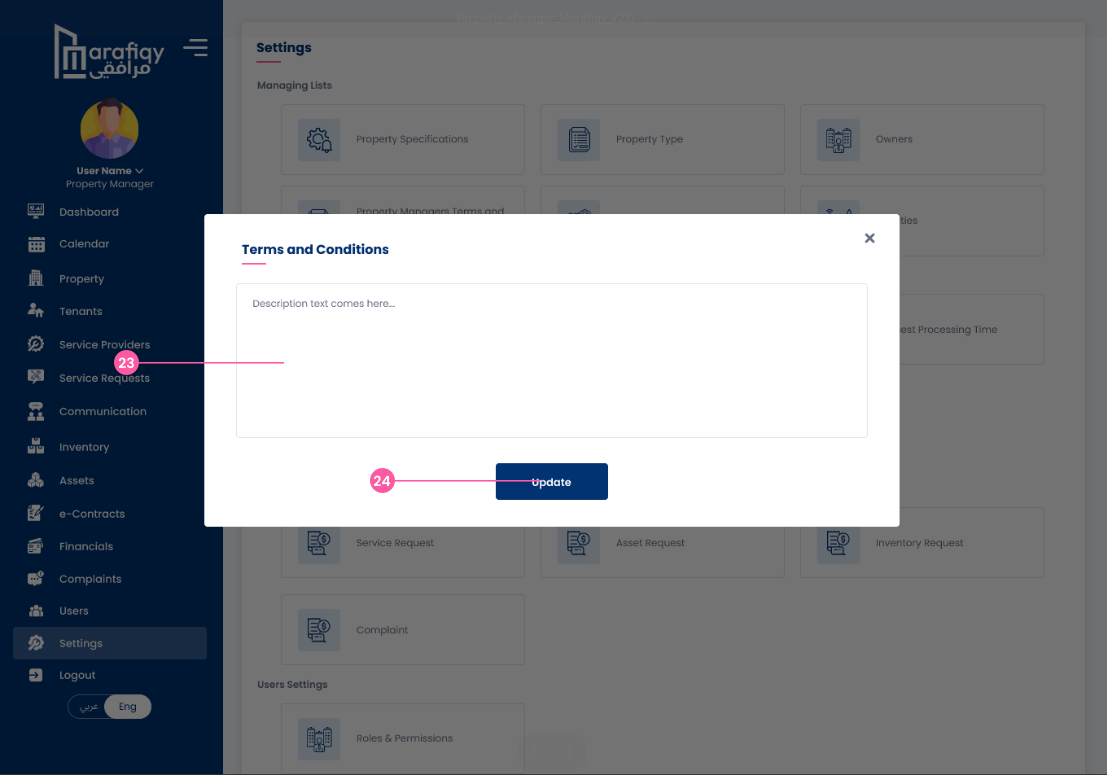
Update the description text of the terms and conditions by editing the field.
Click on the "Update" button to save the changes made to the terms and conditions.
Edit the text for the pet policy description.
Click on "Update" to save any changes made to the pet policy description.
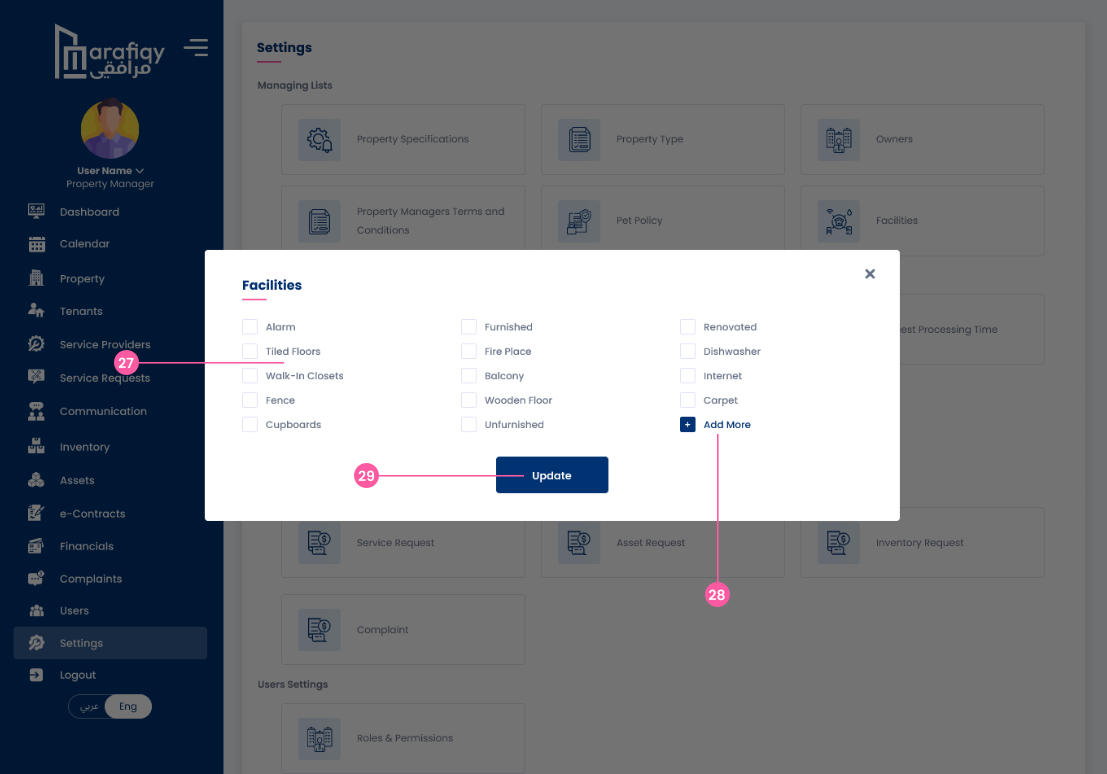
Edit or update the available property facilities by checking or unchecking the boxes.
Click on the "Add More" button to add additional property facilities.
Click on the "Update" button to save changes made to the property facilities list.
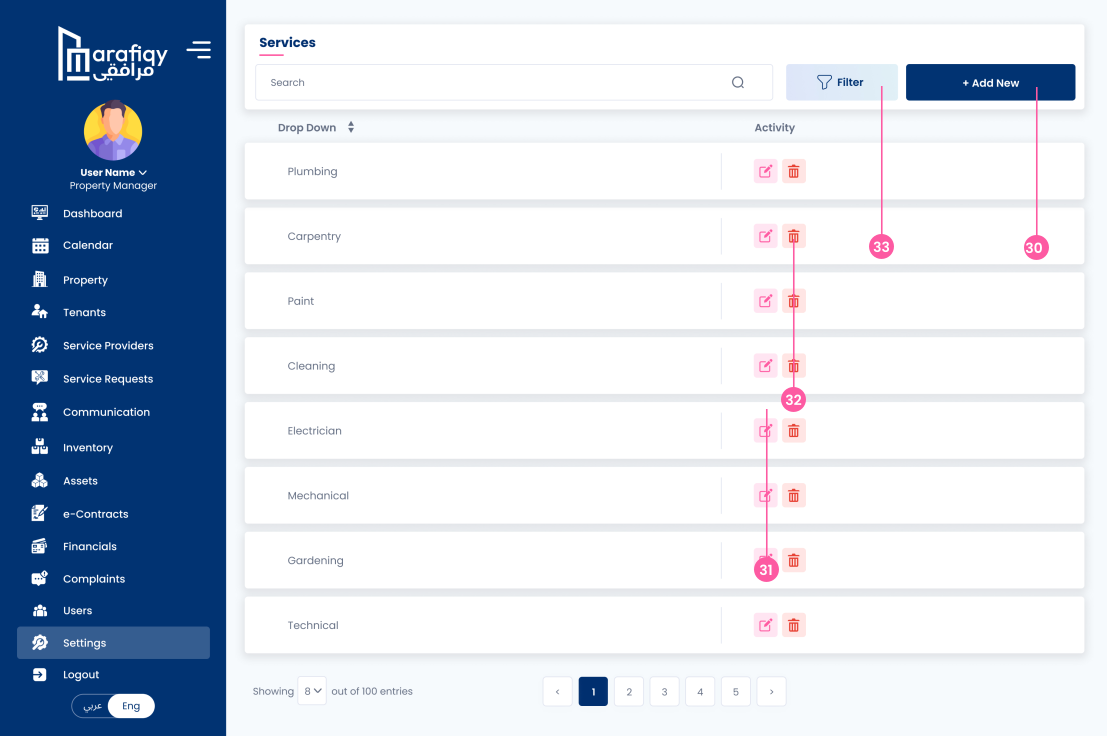
Click on the "Add New" button to add a new service.
Click on the edit icon to modify the service details.
Click on the delete icon to remove a service from the list.
Use the filter option to search and filter specific services.
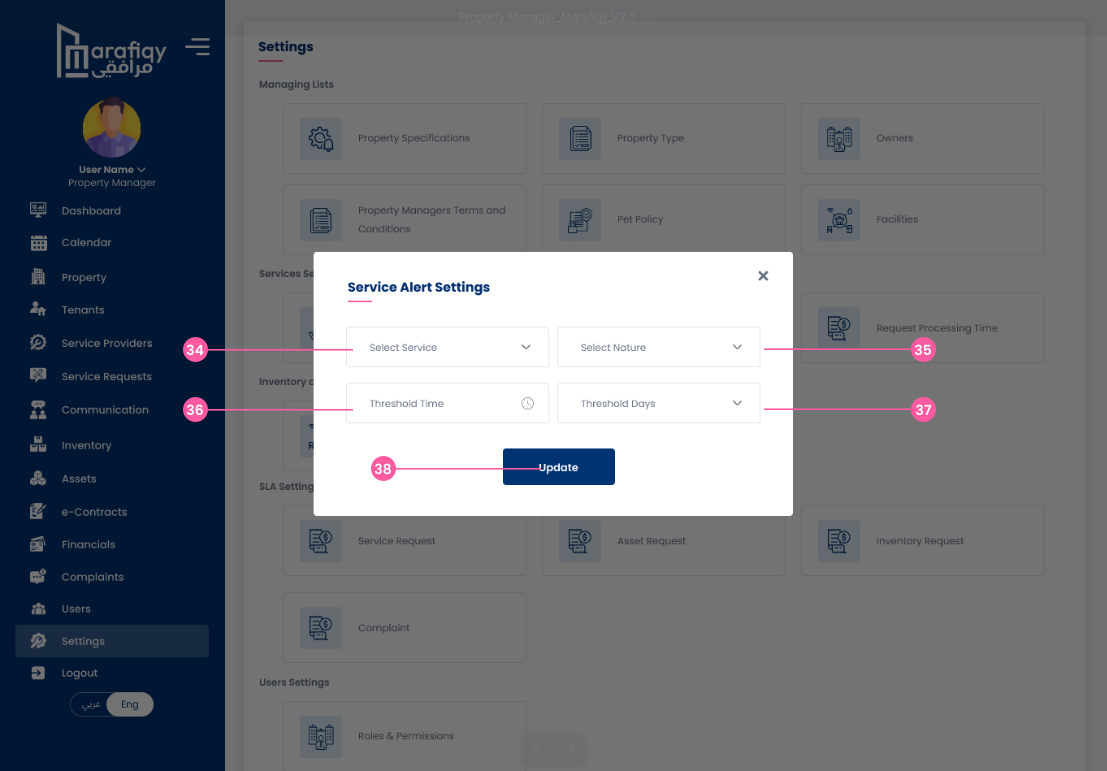
Choose the service for which the alert is to be set.
Select the nature of the service alert.
Define the threshold time for the service alert.
Define the threshold days for the service alert.
Click on "Update" to save the service alert settings.
Click on the “+ Add New” button to add a new inventory item.
Click on the edit icon to modify details of the item.
Click on the trash icon to remove the item from the inventory.
Use pagination controls to navigate through different pages of the inventory list.
Click on the “+ Add New” button to add a new asset.
Click on the edit icon to modify the details of the asset.
Click on the trash icon to remove the asset from the list.
Use pagination controls to navigate through different pages of assets.
Choose the service for which you want to set the request details.
Select the nature of the service request.
Define the threshold time for the service request.
Set the number of days as the threshold for the service request.
Click on the “Update” button to save the changes after configuring the service request settings.
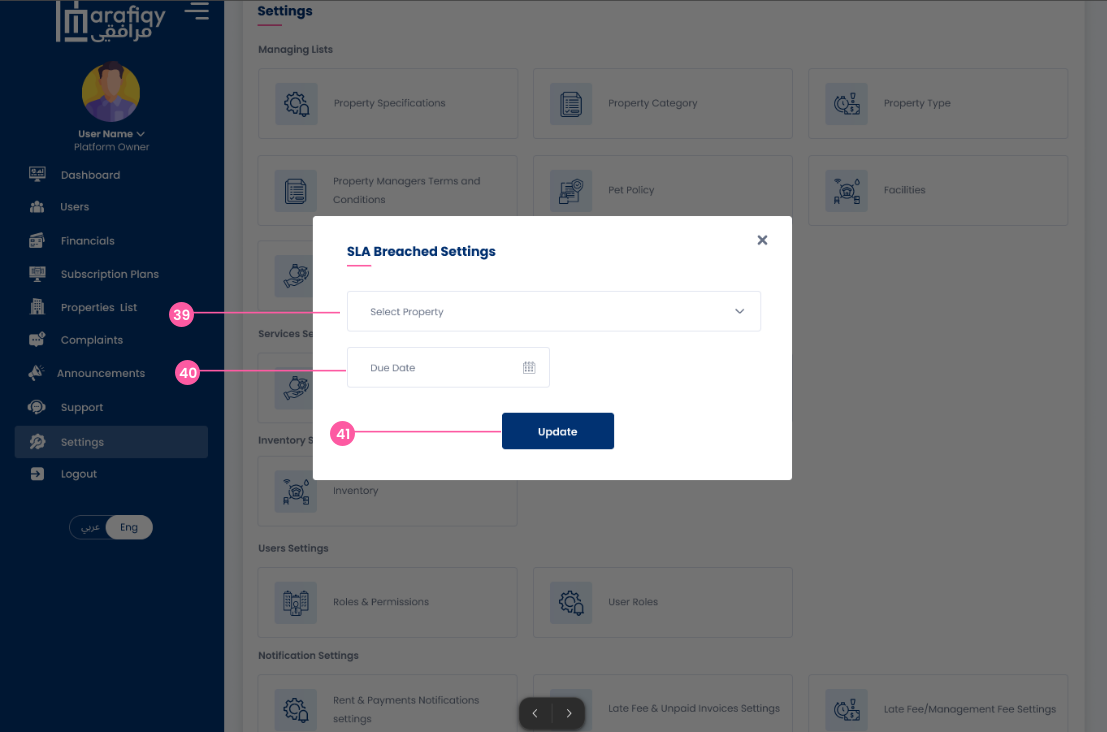
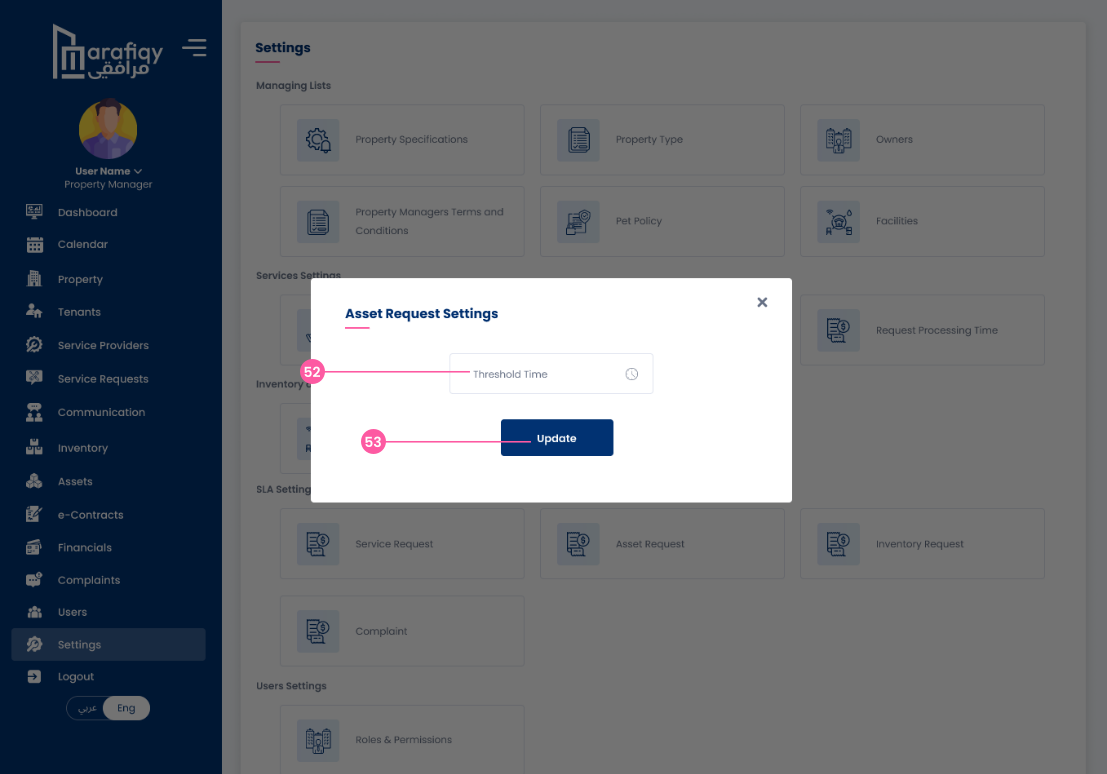
Select and set the threshold time for asset requests.
After selecting the threshold time, click "Update" to apply the changes.
Select and set the threshold time for inventory requests.
After setting the threshold time, click "Update" to apply the changes.
Select and set the threshold time for complaint settings.
After setting the threshold time, click "Update" to apply the changes.
Assign permissions for different roles such as Tenant, Service Provider, Accounts Officer, etc.
Select checkboxes for each permission related to the roles listed.
After assigning permissions, click the "Update" button to save the changes.
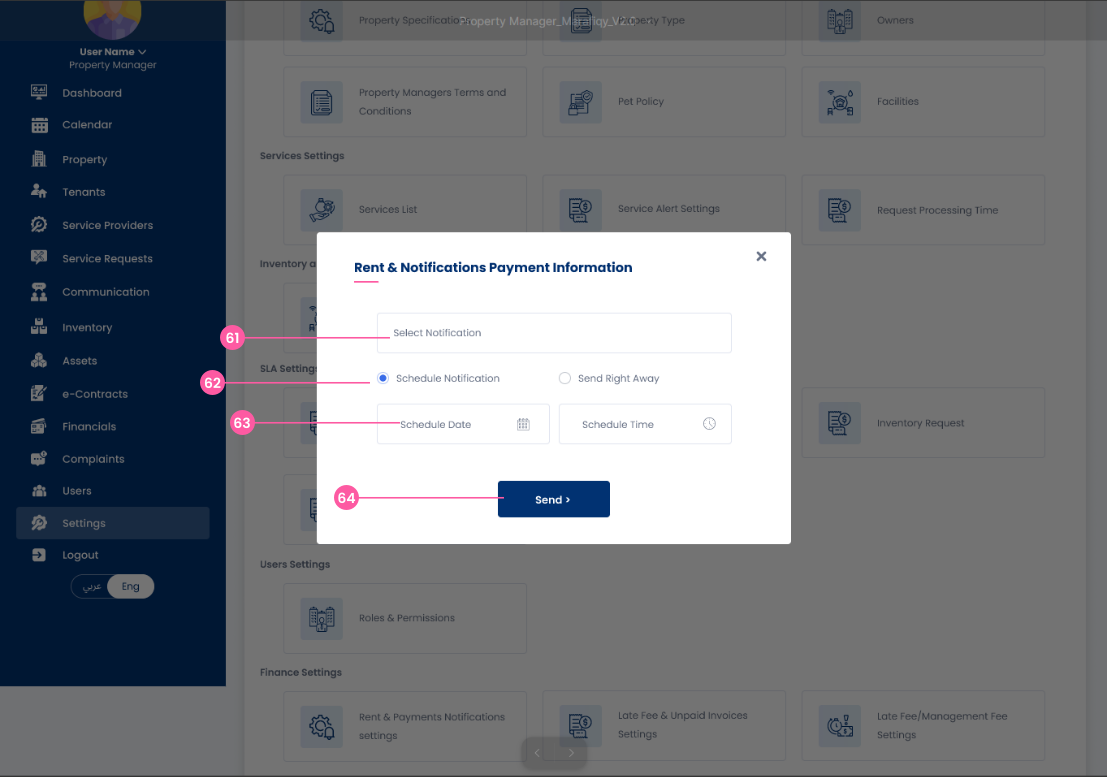
Choose the notification type from the "Select Notification" dropdown.
Select "Schedule Notification" or "Send Right Away" based on preference.
If "Schedule Notification" is selected, set the schedule date and time for the notification.
After setting the details, click the "Send" button to send the notification.
Type the notification details in the provided input field.
Set the reminder for unpaid invoices: "After Every" X Days and "Before the Due Date" Y days.
After setting the reminder details, click the "Update" button to save the settings.
Input the rent amount in the specified field.
Set the due date for the rent payment.
Choose the payment period (e.g., "Per Month") from the dropdown.
Set the late fee penalty for overdue payments.
After entering all necessary details, click the "Update" button to save the settings.
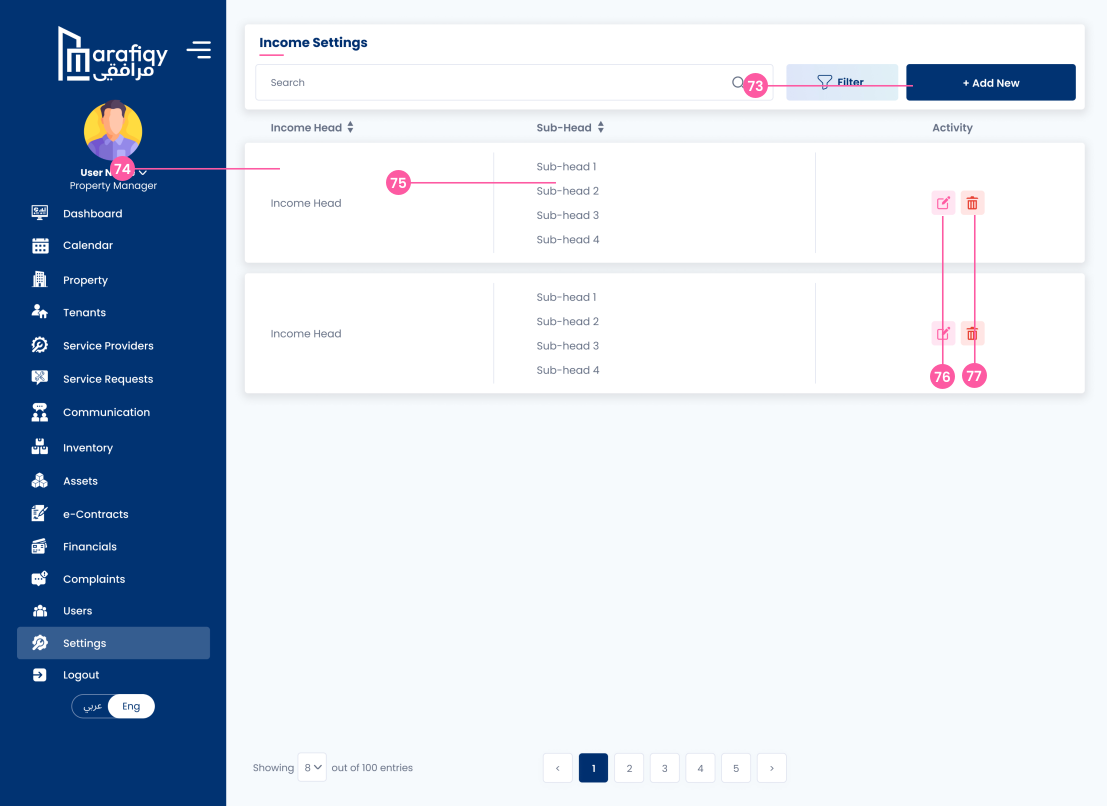
Click on the "+ Add New" button to add a new income head.
Enter the main income category in the "Income Head" section.
Add subcategories under each income head for detailed classification (Sub-head 1, Sub-head 2, etc.).
Click on the edit icon to modify existing income categories or sub-heads.
Click on the delete icon to remove any income head or sub-head from the list.
Click on the "+ Add New" button to open the popup for adding a new income category.
Enter the name for the main category of the income in the "Income Head" field.
Add subcategories to the "Income Head" in the "Sub-head" field for further classification.
Use the "+ Add More" button to add additional sub-heads under the same income head.
After filling in the required details, click "Submit" to save the new income and its sub-heads.
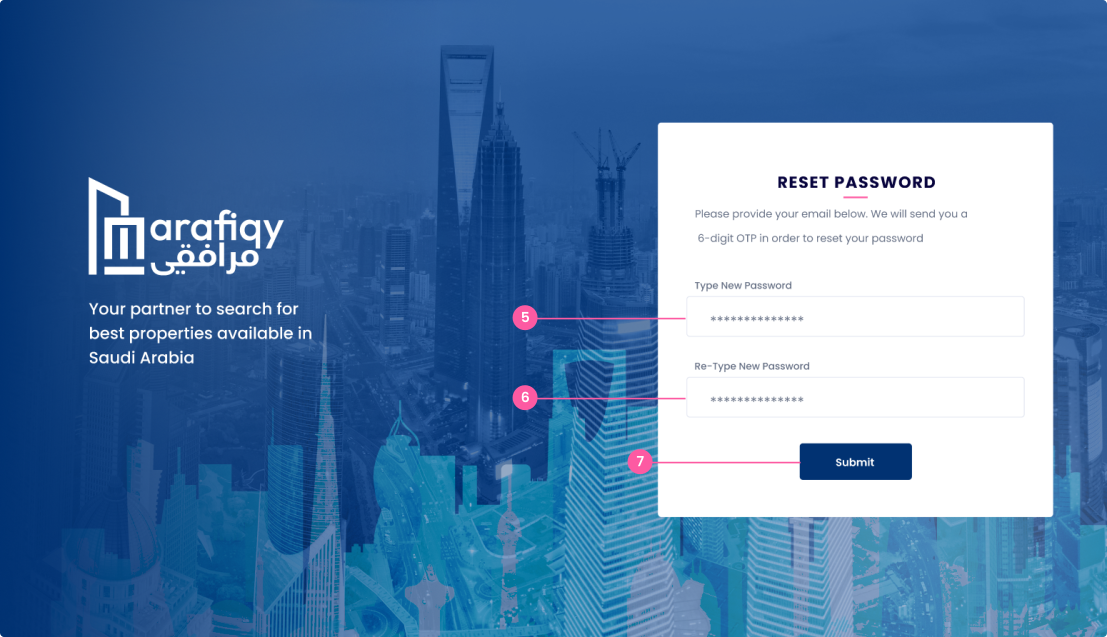
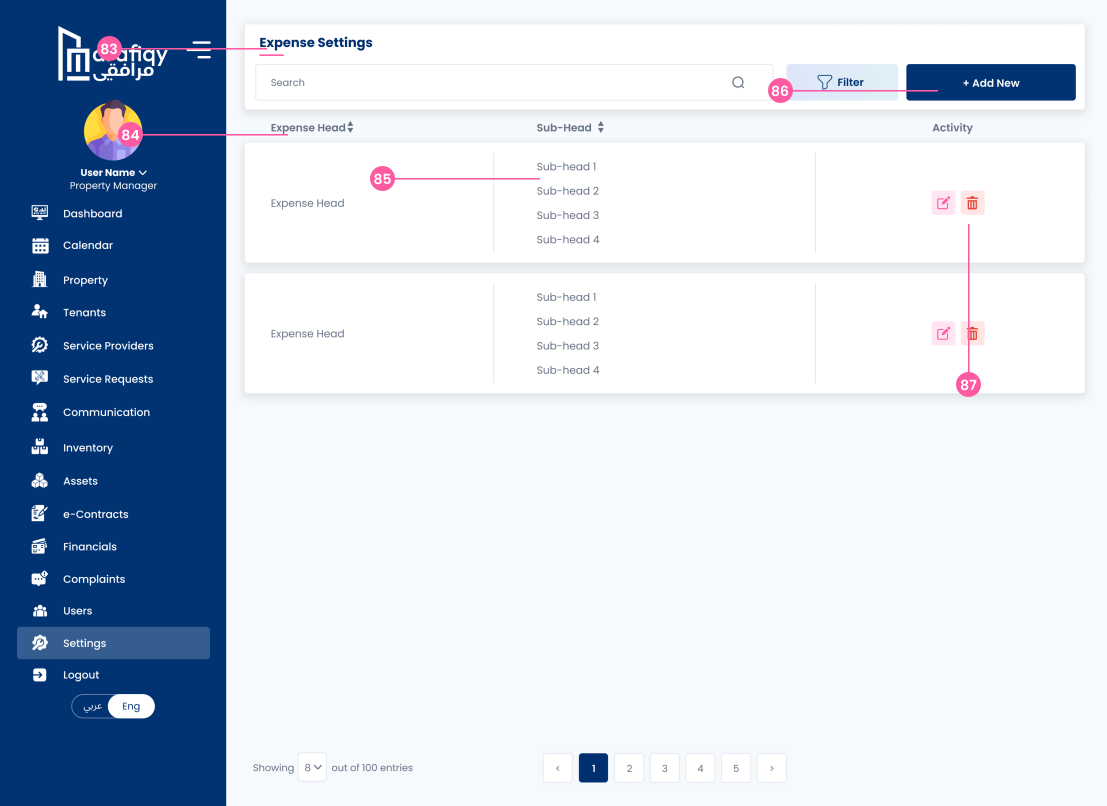
This section allows for managing and adding new expense categories with their subcategories.
The "Expense Head" field is used to define the main category for expenses (e.g., Rent, Utilities).
The "Sub-head" section provides further classification of each expense head (e.g., Office Supplies).
To add a new expense category or subcategory, click on the "+ Add New" button.
Use the edit and delete icons next to each entry to modify or remove expense categories or sub-heads.
Click on the "+ Add New" button to open the popup for adding a new expense.
Enter the name for the main category of the expense in the "Expense Head" field.
Add subcategories to the "Expense Head" in the "Sub-head" field for further classification.
Use the "+ Add More" button to add additional sub-heads under the same expense head.
After filling in the required details, click "Submit" to save the new expense and its sub-heads.